


Whether you limit your sun exposure to your walk to and from work or spend your days asleep on the beach (jealous!), summer skin protection is an absolute must. Lately, we've noticed that the coolest editors and trend-setters have been protecting their fashionable scalps with luxe, loud fitted caps. To keep you up to pace (and safe from the sun) we're showing you how to turn your must-wear plain black topper into a must-have "snakeskin"-printed number. Read on for the how-to!
Here's what you'll need:
A well ventilated room (safety first, kids!)
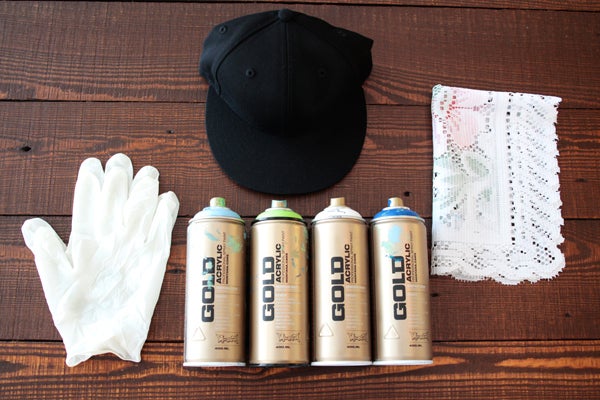
A plain black baseball cap
A pair of rubber gloves
Three colors of spray paint in the same color family and one can of white
A cheap doily or piece of lace
AdvertisementADVERTISEMENT
Click through to read the rest of the DIY!

Step 1: Using your darkest color (in our case, blue), spray along the sides of the front of your hat. Make sure to get an even coat on the entire surface, including the brim.

Step 2: Following the first coat, spray the second color (lighter blue) along the first in two even lines. Fill in the middle with your third accent color (green). Wait for all three coats to dry completely.
Step 3: Once your paint has dried, cover your hat with the doily.

Step 4:
Smooth the doily around your hat, making sure it's completely flat against the hat's surface.

Step 5: Once your hat is completely covered, lightly spray white across the holes in the doily.

Step 6:
And, bang, you can enjoy your new "snakeskin"-printed hat!
AdvertisementADVERTISEMENT